Wednesday, April 29, 2009

Wordless Wednesday


-- Post From My iPhone

Monday, April 27, 2009

Menu Plan Monday--4/27/09

john cena
I luckily had a little time at work this weekend to get this planned out on paper. We never managed to get the Shrimp and Grits done from last week, so that got bumped to tonight.
Luckily that makes me not have to grocery shop until tomorrow --which is good since my work schedule is crazy this week and I got absolutely zero sleep yesterday. Easy food for Tuesday since I will have worked the night before. Anyway, here it is. All low carb and a recipe or two to boot.

  • Monday--Shrimp and Grits (mashed cauliflower subbing for the grits) with Spinach Salad
  • Tuesday--Crockpot Pot Roast with Turnips and Green Bean Salad (the turnips peeled and cut up in crockpot in lieu of potatoes)
  • Wednesday--Tangerine Up the Butt Chicken (recipe below) and Grilled Broccoli Salad (recipe below)
  • Thursday--Grill Basket Lamb Kebabs with Grilled Summer Squash and Mushrooms (cut up a boneless lamb roast into cubes and marinade all day in ziplock bag. Cook on grill in grill basket to skip all the skewering)
  • Friday--Portabello Mushroom Pizzas (top lg portabellos with pizza topping and bake...delish!)
  • Saturday--Turkey Legs and Yard-long beers at Tennessee Renaissance Festival --it is the first weekend and kids and grandparents get in free!!

Orange-Tangerine Up the Butt Chicken
--from The Low Carb BBQ Book by Dana Carpenter
1 whole roasting chicken (3-4 lbs)
1 tsp salt
1 tsp splenda
1 drop blackstrap molasses
1 tsp chili powder
3 tbsp low sugar orange marmalade
1 can Diet Rite tangerine soda (wash that can!!)
2-3 tbsp oil
1 tsp spicy brown mustard

Light one side of gas grill. Rinse chicken and pat dry. Combine salt, splenda, molasses and chili powder in small bowl. Reserve half the mixture and rub the other half inside the cavity of the chicken.
Stir the marmalade into the reserved seasoning mixture. Open can of soda and pour out 2/3 cup. Add 1/4 of the cup that you poured off into the seasoning mixture and then drink the rest that you poured off.
Punch several more holes in the top of the soda can with a can opener. Spray the can with cooking spray and set it in a shallow baking pan. Carefully place your chicken down over the can, fitting the can into the cavity of the chicken. Rub down the chicken with olive oil.
Set your chicken, standing upright on the soda can on the side of the grill not over the fire. Close the grill and cook at 250degrees for 75-90 minutes or until juices run clear.
While chicken is roasting, add mustard to marmalade seasoning mixture. Use this to baste chicken with for the last 20 minutes or so.

Grilled Broccoli Salad
--Low Carb BBQ Book by Dana Carpenter
1 head fresh broccoli
2 tbsp olive oil
1/4 cup rice wine vinegar
1/4 cup soy sauce
2 tbsp toasted sesame oil
4 tbsp sesame seeds

Trim bottom of broccoli head and separate into large spears. Brush with a bit of olive oil and grill over medium fire until flecked with brown spots. Remove from fire.
Pt broccoli in a bowl and add rest of oil, vinegar, soy sauce and sesame oil. Stir it all up and let set for a half hour.
Meanwhile, toast your sesame seeds in a dry skillet over medium flame until they start to make a popping sound. Add to salad and toss to combine. Serve at room temp.

I had posted the Cauliflower recipe I will use tonight previously here.
Enjoy!!

Thursday, April 23, 2009

Unveiling the New Play Kichen

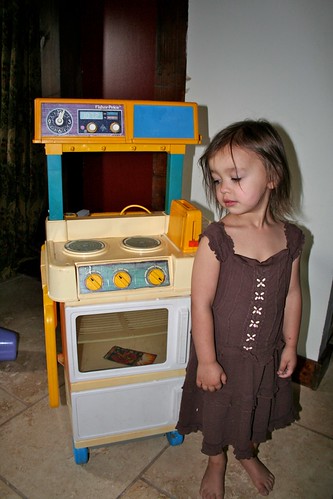
My baby girl, until today, had my 20 something year old sister's hand me down play kitchen. Her big sister and brother had it before her...well, her big brother liked tractors better, but you get the point. Vintage Fisher Price with the original toaster and everything. See....
Old Play Kitchen
There is nothing actually wrong with this kitchen....except that I LOATHE it. I never liked it when we had it out 10 years ago and I dont like it now. It is an "in the round" type kitchen for lack of a better description. All that means is that it has to sit smack in the middle of the floor if you want to play sink AND stove. All the doors perpetually hang open and nothing fits inside it. I have a big ugly rubbermaid box next to it to hold all the accessories and that is just tacky. It is sitting in our living room for heaven's sake....along with 10 million other things so another rubbermaid box is the last thing we need.
So, last week I was inspired by some kitchens I saw here. I would be more specific, but there were many, many inspirations--mostly ones based off Ikea shelving and found objects. Do a search and you will see many. May I also say that I have an unnatural love for that website. Beautiful ideas abound so check it out.
Anyway, I decided we could do this on the cheap and have something I dont mind walking past when I head to the living room. We were standing in the basement and I drew a little plan on some scrap paper and put measurements of the approximate size I wanted. We stood there and figured out how much wood we would need and headed to Lowes.
In the end we spent $22 on two MDF stair tread things for the sides, a piece of pegboard for the back--both revisions (improvements) of my plan by the dude who has to build the thing--and a clearance handle that turned into a towel rack. I went to Michael's and Walmart the next day and got all the little odds and ends that I wanted for the top (I had a vision, dontcha know) and the baskets for storage. That I think was about $30 with the baskets. The butcher block counter top was a scrap from my parent's new kitchen.
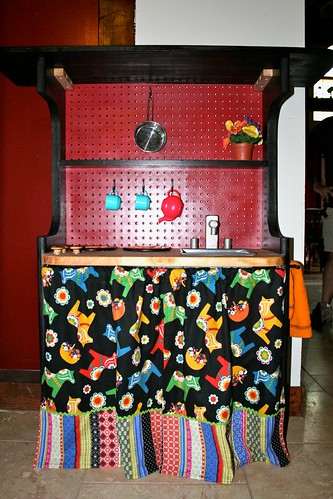
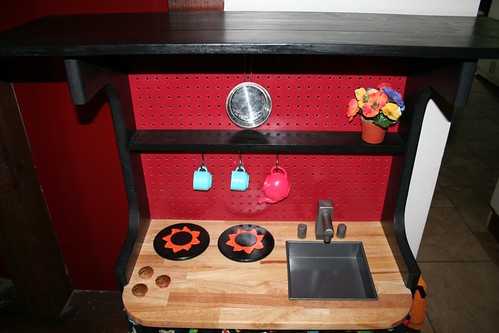
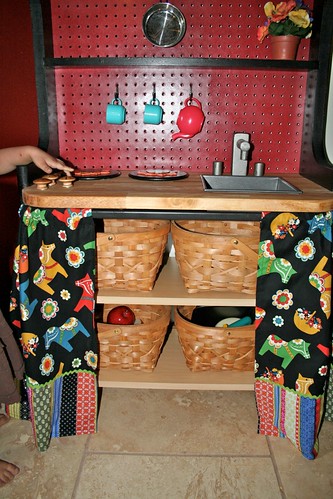
It was definitely a joint project. Chris was responsible for the structure of the thing, shelf building, etc. I did the sanding and painting, designed all the little knobs and burners and actually ended up making the faucet and knobs since I couldnt find a real faucet anywhere for less than $30. Oh, and I made the curtain too. I was going all black except the countertop, but Chris suggested the red back--good choice. I love it. The fabric that I had mentioned earlier turned out as adorable as I had hoped. Here is hoping it stays in place.
This is the NEW kitchen...
The new kitchen
The top of it with all the knobs and gadgets looks like this...
Top view of new kitchen
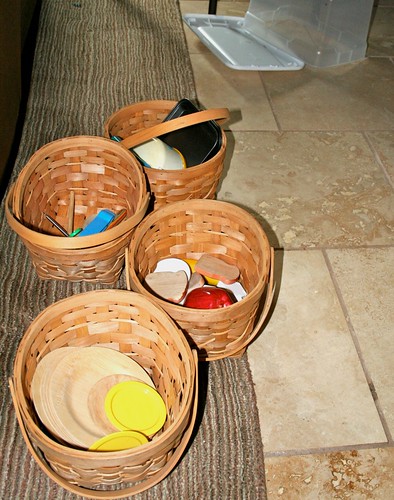
All the accessories are now organized into cutie little baskets instead of big ugly plastic...
Kitchen Baskets
And then everything fits INSIDE the kitchen and behind the cute little curtain...
Basket Storage in new kitchen
I am very, very happy with it. I have some more pegboard hooks I am painting for the back and I am making her an apron and a couple pot holders to match the curtain but other than that, this project is FINIS!! Total price a hair under $60. If you click on the pics it will take you to Flickr and you can see lots more of the pictures.
Now, oh sister of mine, what do you want me to do with YOUR kitchen?!

Tuesday, April 21, 2009

Cool Stuff!!


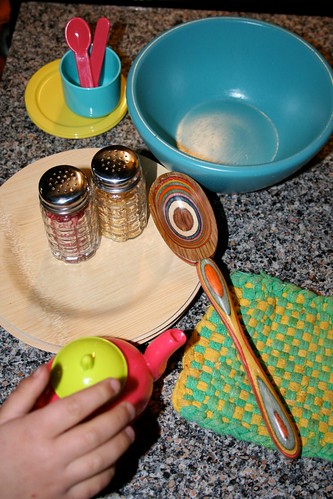
Play Kitchen Accessories, originally uploaded by Rowetopia.

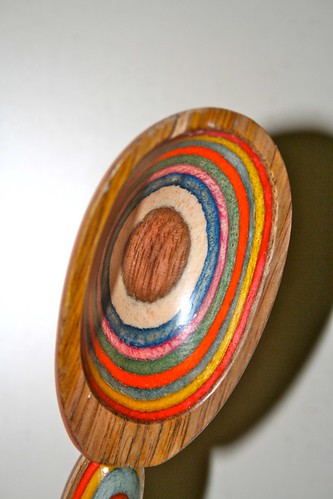
Cariboo and I went looking for a couple things this morning and came back with this stuff. Very colorful and very cute. If we ever finish this kitchen project, she will be very stylish. I am trying to find non-plastic food items for her kitchen, which is slightly difficult. Those plates are bamboo, the bowl and spoon are wood, the potholder is loom made by the big sister (and not for this...mommy has been using it for years) but this tea set, however....not so much organic. More like totally cheapo plastic and probably toxic just to look at it. She was in love though...

I am glad for the nice organic-ish-ness of it (yes, I made that word up) because two seconds after we got in the car she tried to chew the end off.Wooden spoon
Dont ask me. She is waaaay too old to be teething....just being annoying I think.

And the whole time I was piling this stuff here to take the picture, she was trying to steal the teapot to pour "tea" into the other glass.
Play Kitchen Accessories
She is the bad seed, but she sure is cute.

Also, I had to have this. How could I resist for $4.


It leans...Waahaahaaa.